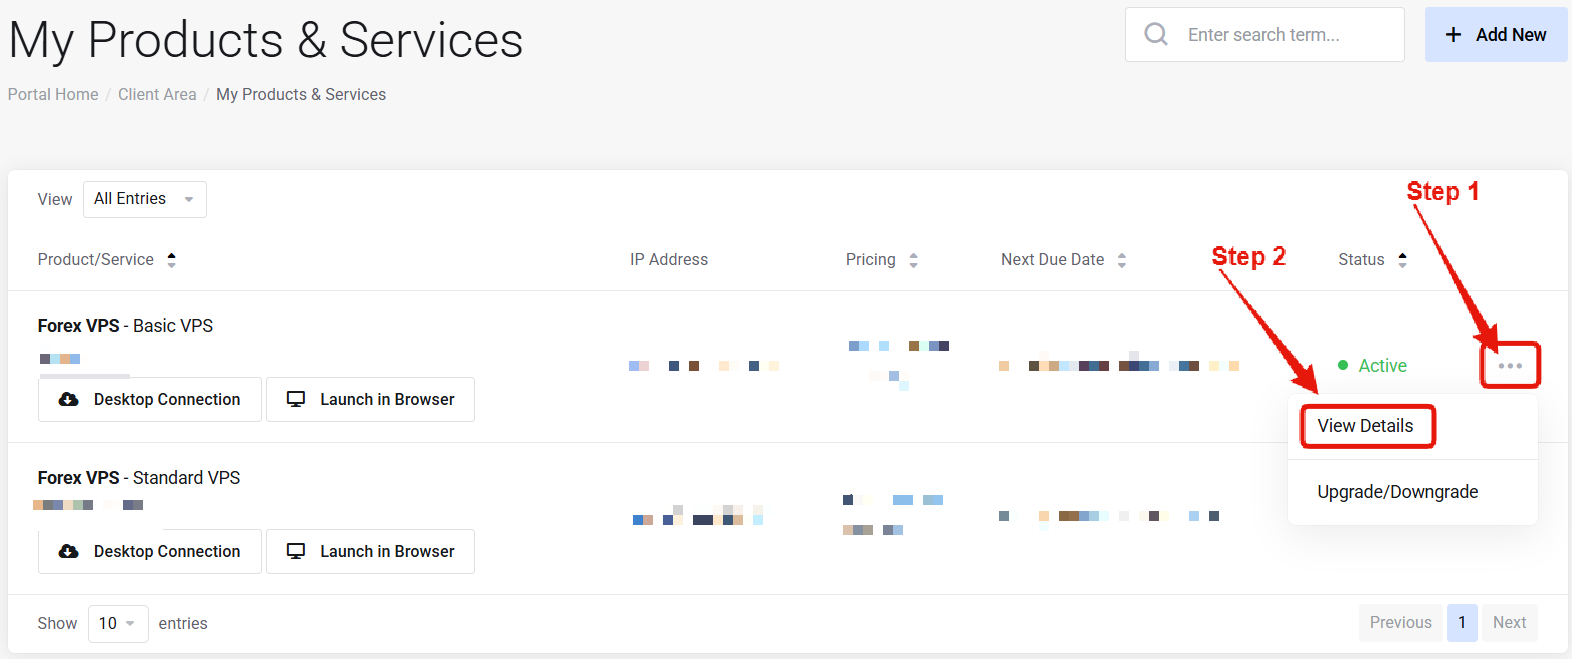
Visit the “My Products & Services” page, and find the specific service that you wish to manage. Click on the three dots to the right side, and then click “View Details”.
2
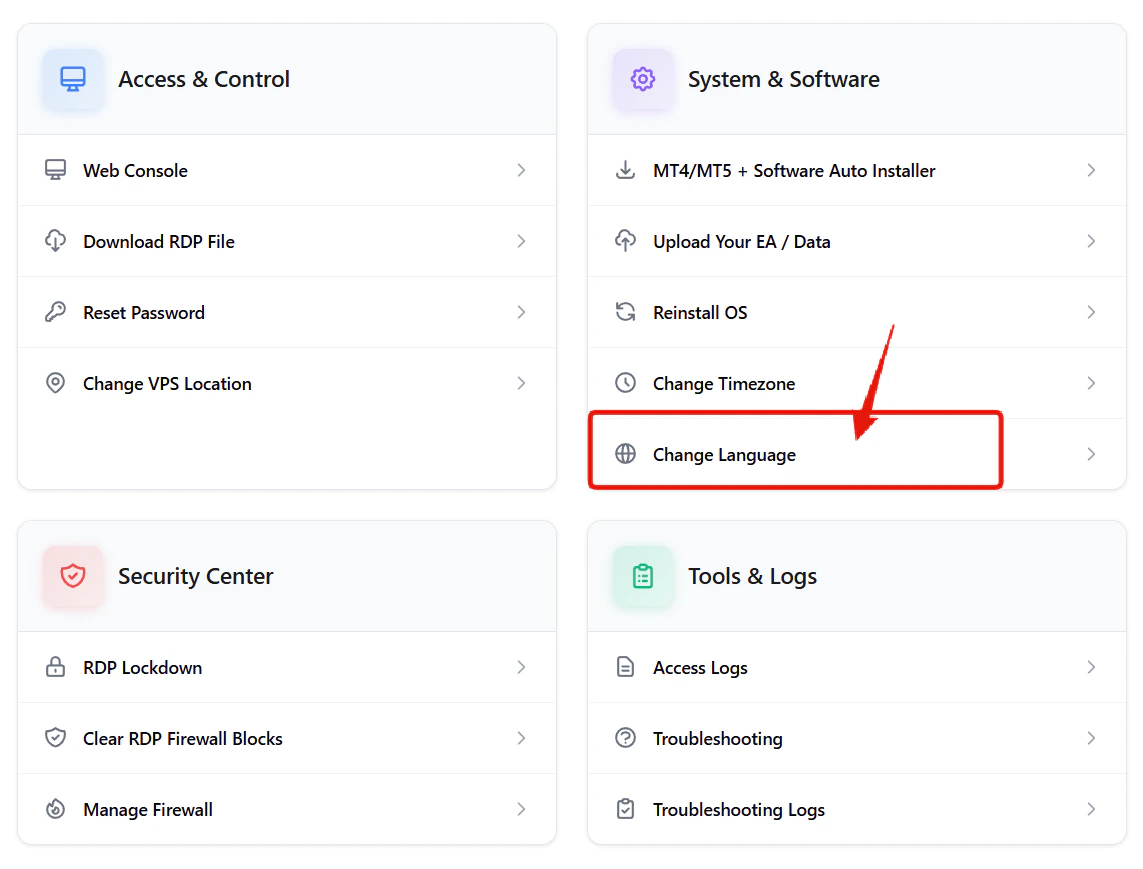
Locate Change Language
Scroll down the page until you locate the “VPS Control Panel” section. Look for the Change Language option under “System & Software”.
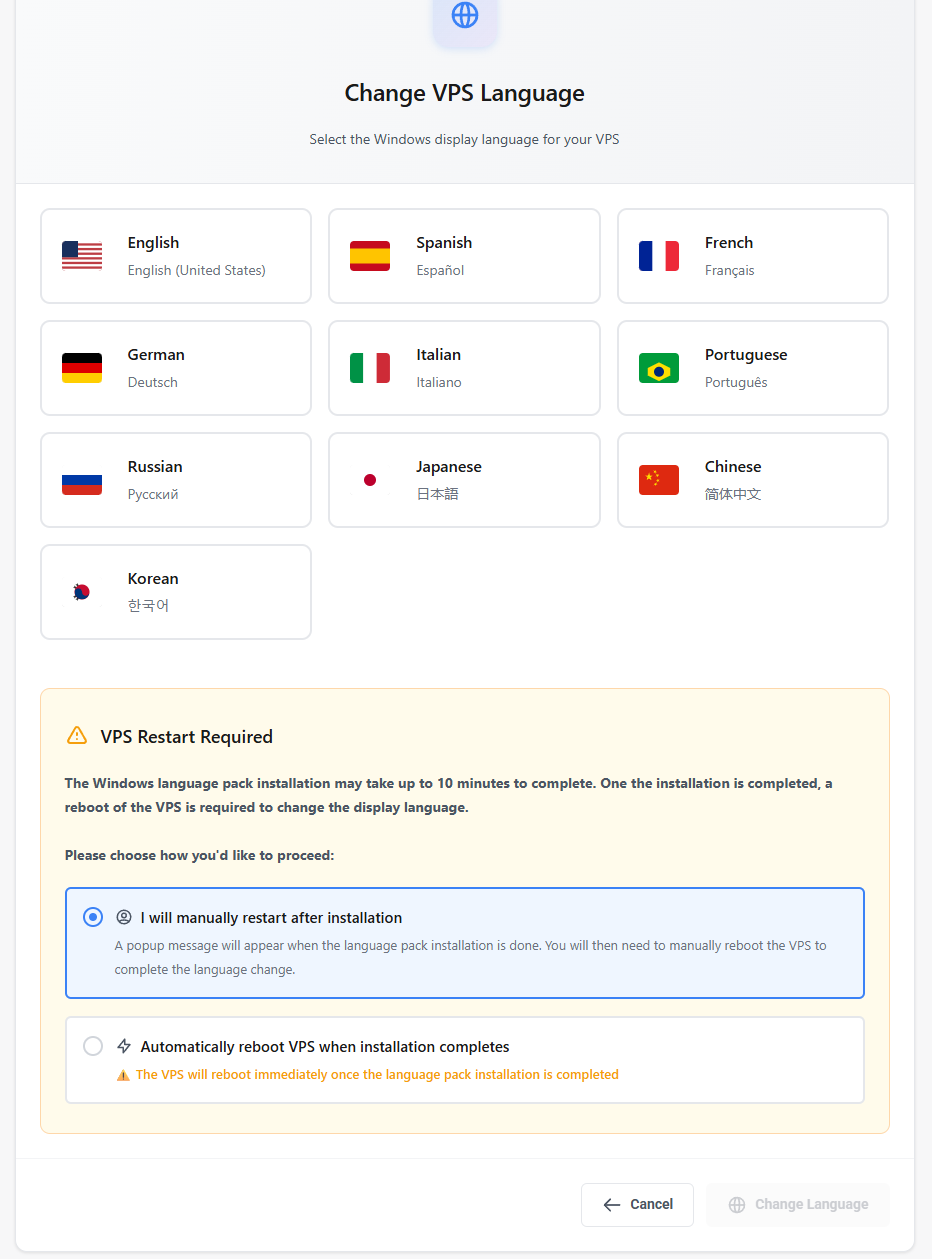
First, select the new language that you wish to set as the primary Windows language display.Next, select your reboot preference and then click “Change Language”.The language installation takes approximately 10-15 minutes to complete. If automatic reboot is selected, the VPS will automatically reboot and set the new language once the installation is completed.If manual reboot was selected, you will need to manually reboot the VPS in order for the new language to be used as the primary display language.