Method 1: Restart RDP Clip Process
Therdpclip.exe process controls copy and paste functionality. Restarting it fixes the issue in most cases.
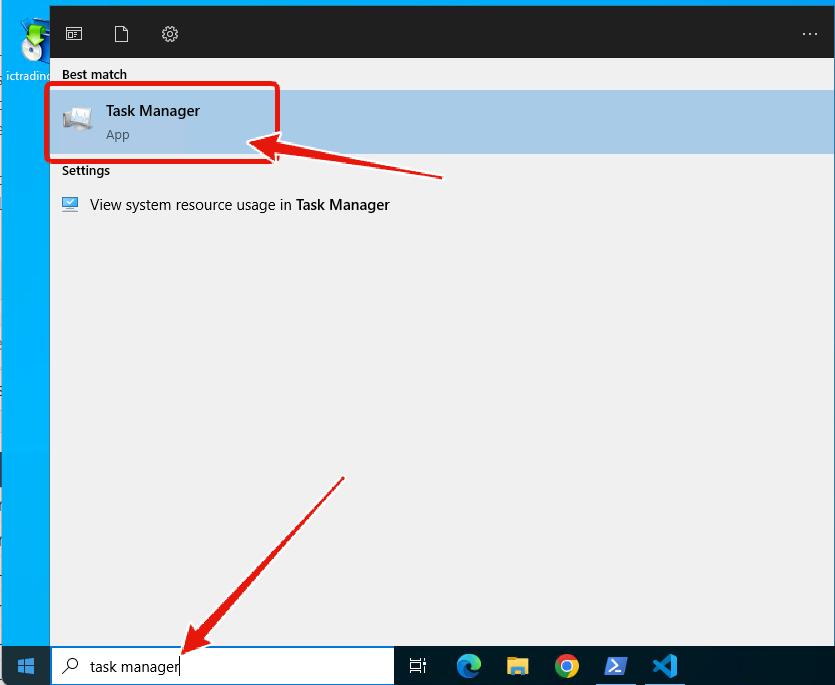
1
Open Task Manager
2
Locate the rdpclip.exe Process
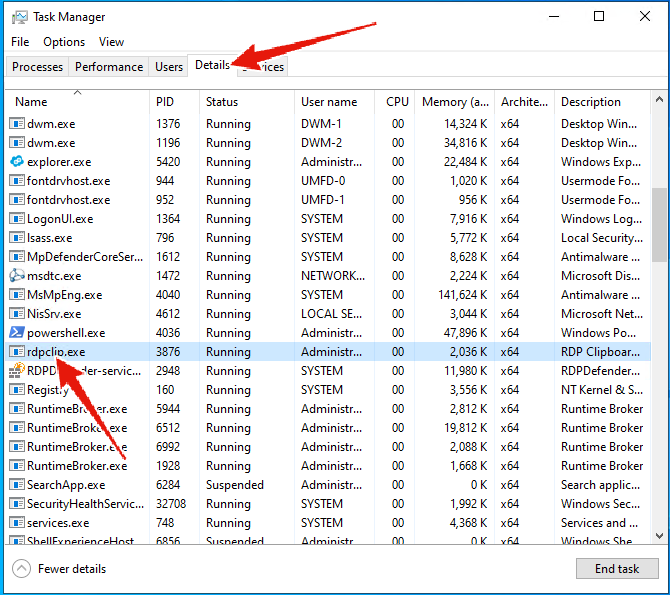
rdpclip.exe process. If you do not see it, skip to Step 4.3
End the rdpclip.exe Process
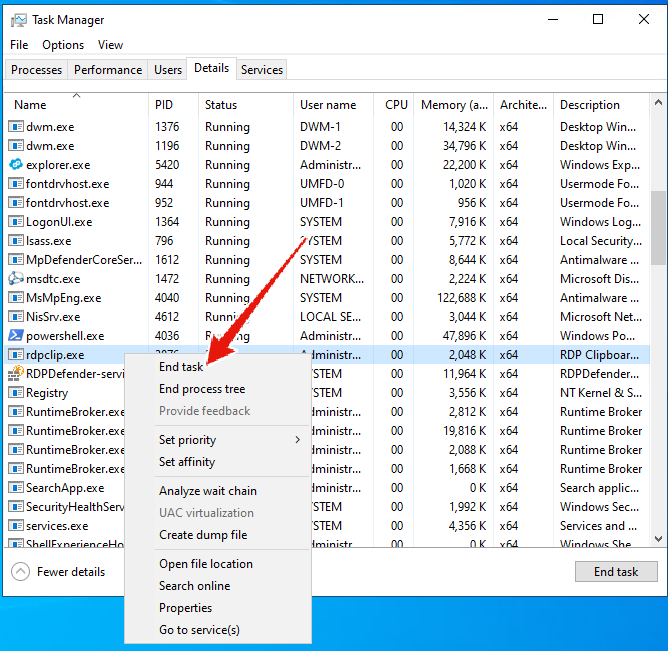
rdpclip.exe process and click “End task”.4
Open Run New Task Dialog
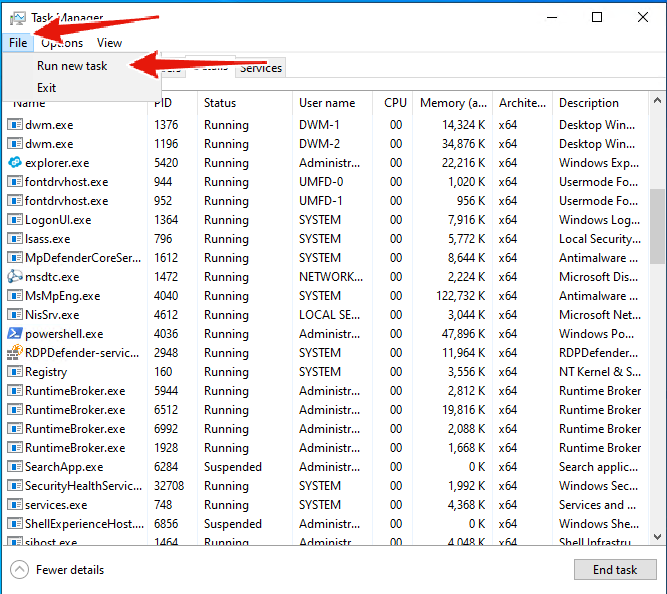
5
Run New rdpclip.exe Process
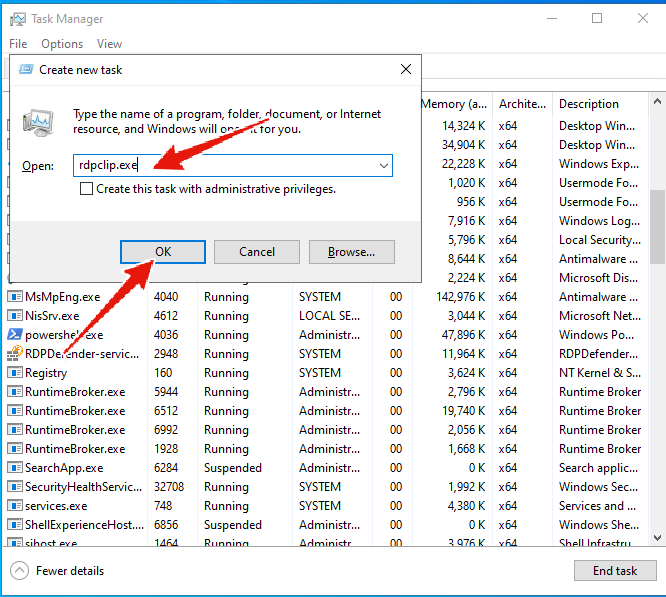
rdpclip.exe and click OK.RDP copy and paste functionality should now be restored.
Method 2: Fix Remote Desktop Clipboard Permissions
If the above method did not resolve the issue, the problem is likely caused by Remote Desktop settings on your local computer. Perform these steps on your local computer before connecting to the VPS.1
Open Remote Desktop Connection
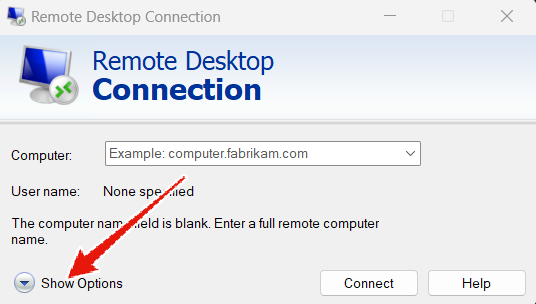
2
Enable Clipboard in Local Resources
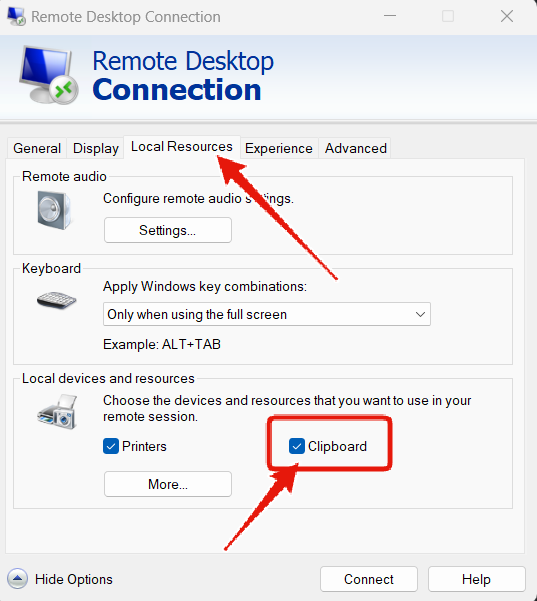
3
Save Settings & Reconnect
Click “Hide Options” and connect to your VPS. Copy and paste should now work correctly.