Where To Find RDP Lockdown
1
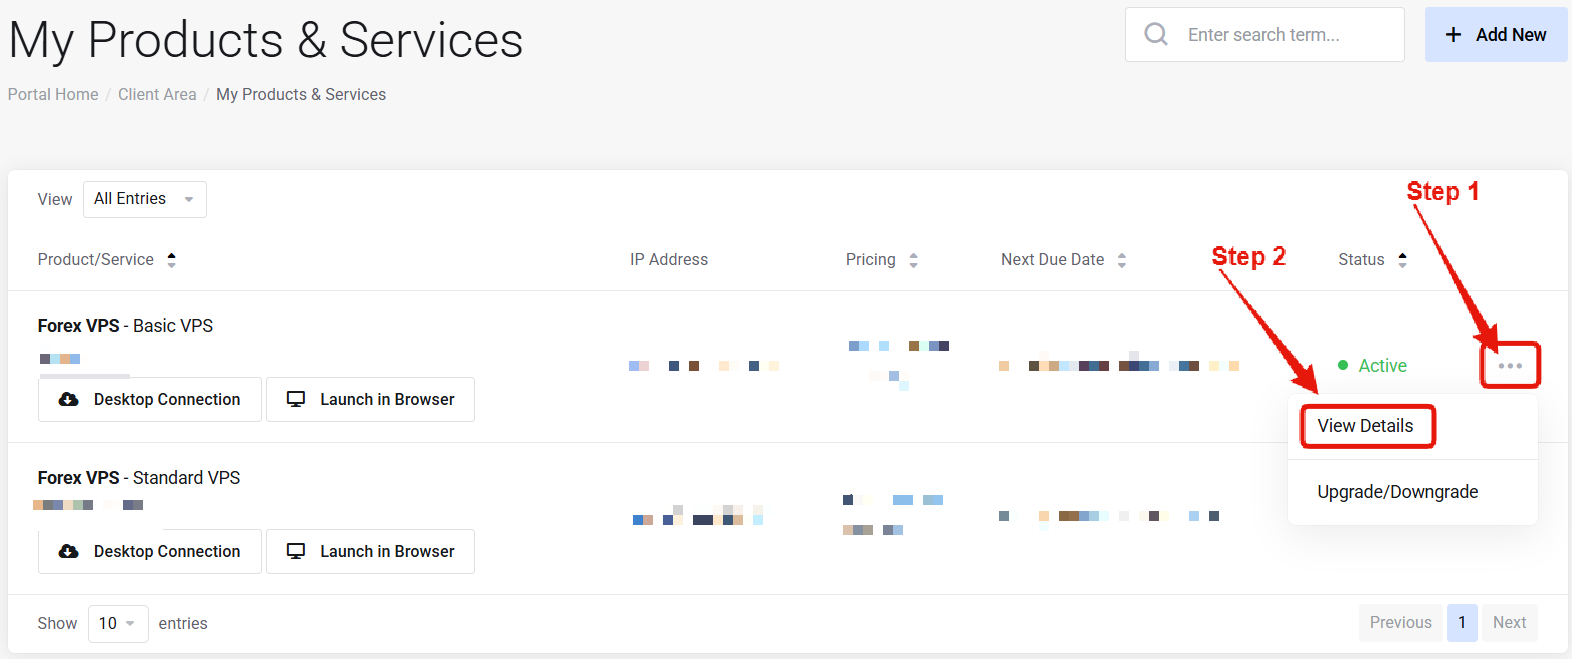
Visit Products & Services Page
2
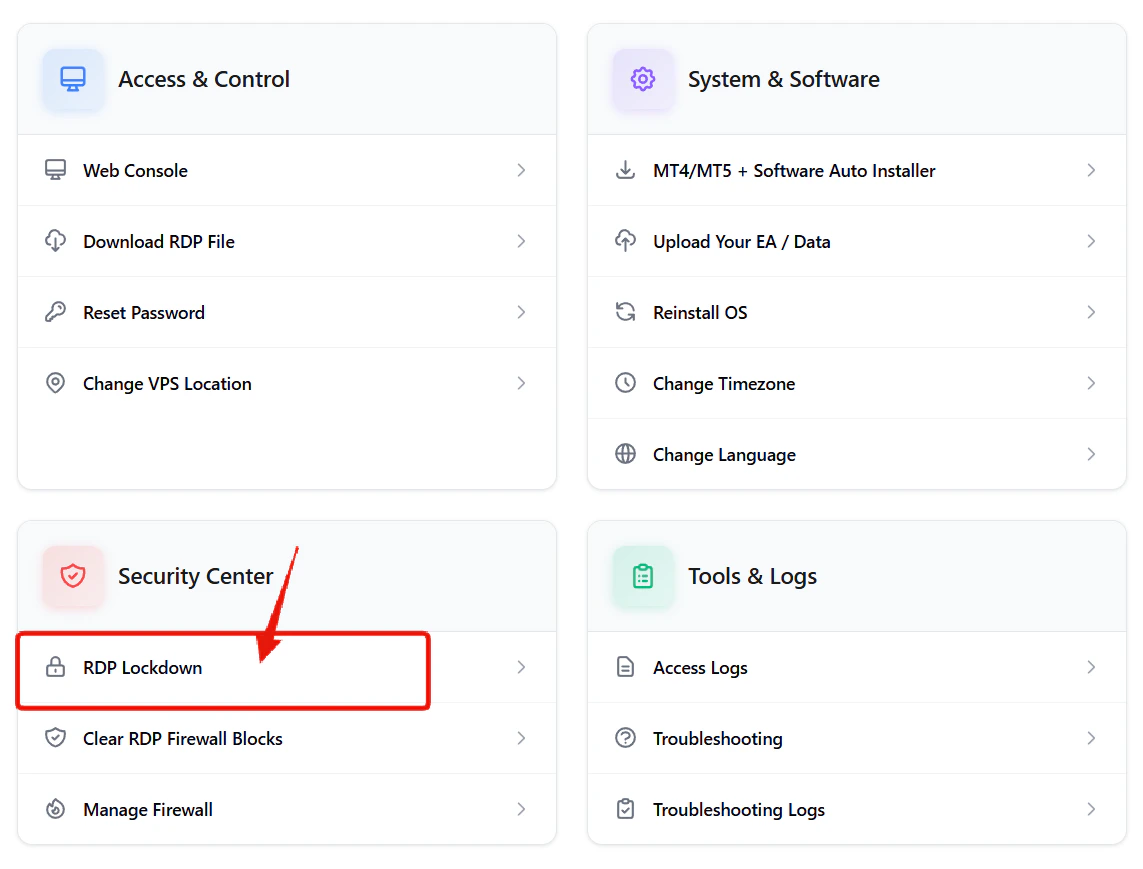
Locate RDP Lockdown
How to Enable RDP Lockdown
192.168.0/24.
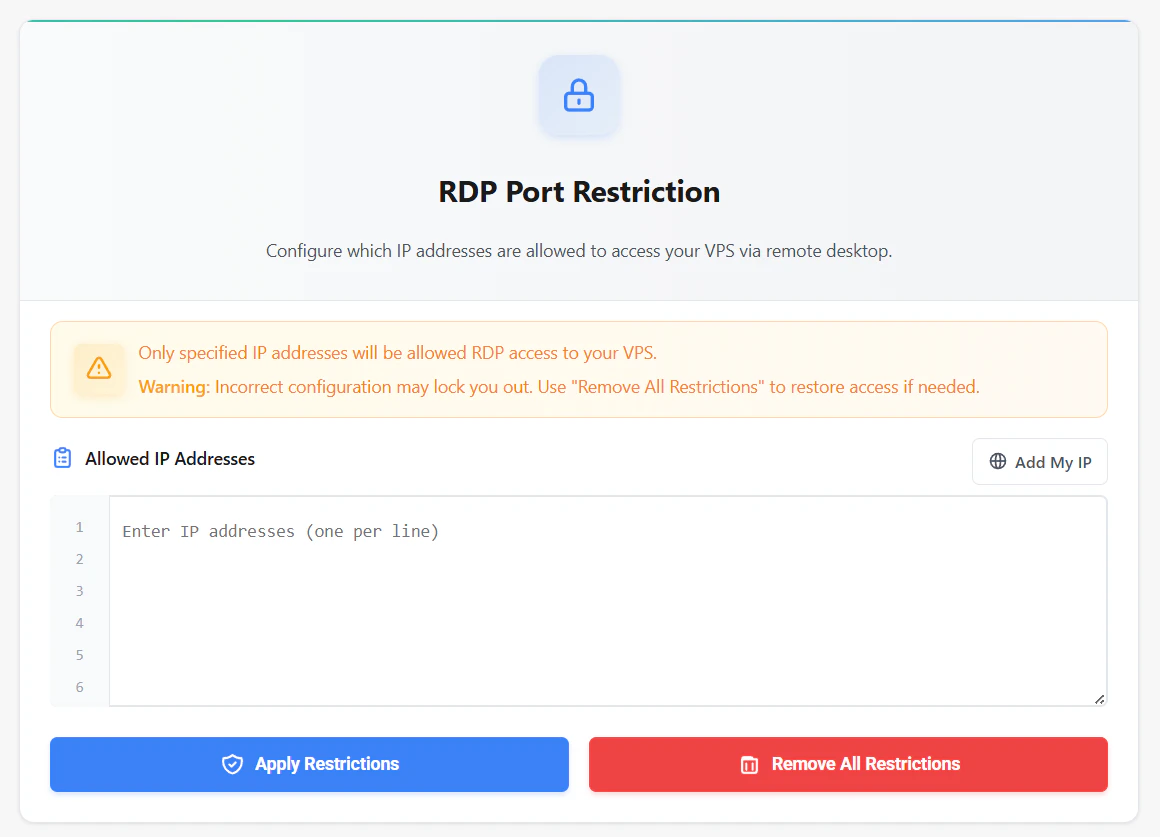
After all authorized IPs are entered, click “Apply Restrictions”. The restrictions will be applied immediately. Going forward, only the allowed IPs will be able to access remote desktop for your VPS — all other RDP traffic will be blocked.
How to Remove RDP Lockdown
Simply click the “Remove All Restrictions” button. Any restrictions put in place will be removed and all IPs will be able to connect again.Common Questions
What if my local IP changes?
What if my local IP changes?
The allowed IP address field supports IP address ranges (
192.168.0/24) so that you can easily whitelist a range of IPs.Does this affect other ports?
Does this affect other ports?
No — only RDP traffic. Use the Firewall for other port protections.