Your service includes one free migration every 30 days. Additional migrations within that period are subject to a $10 administration fee.
How To Migrate
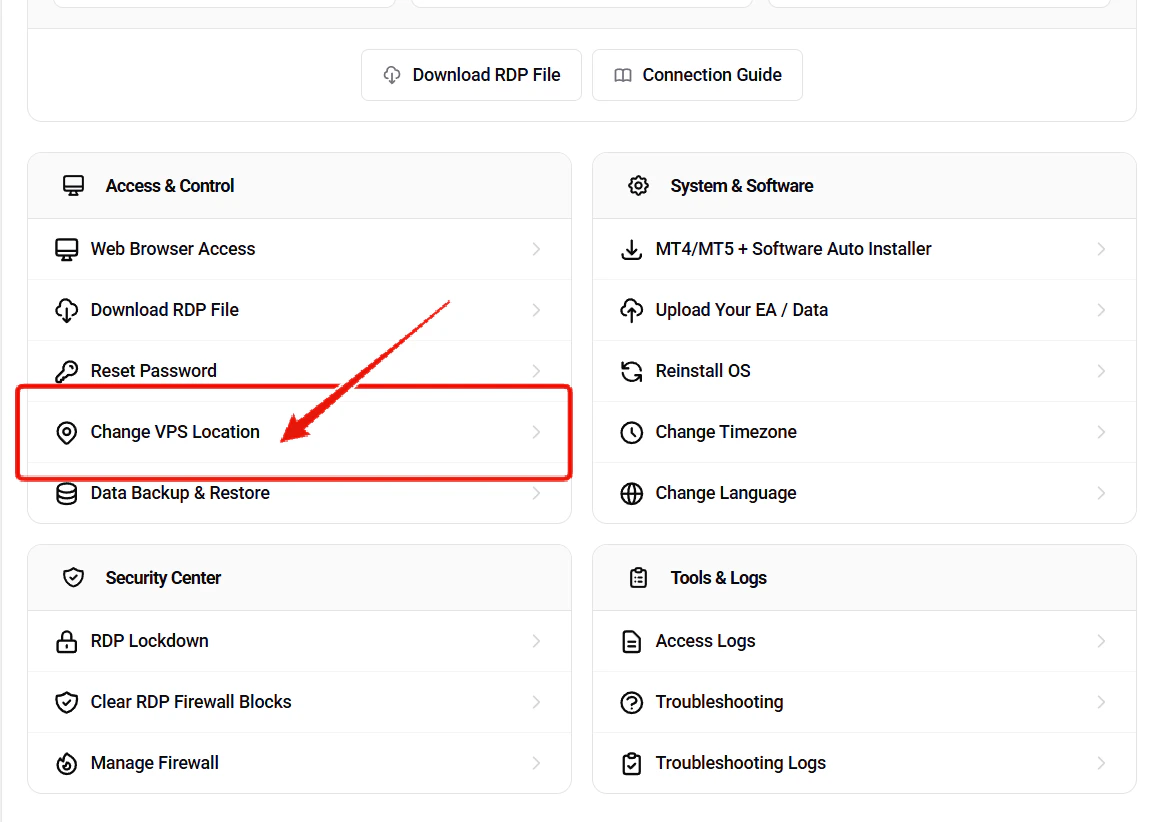
Open the Change VPS Location Page
Select New Location
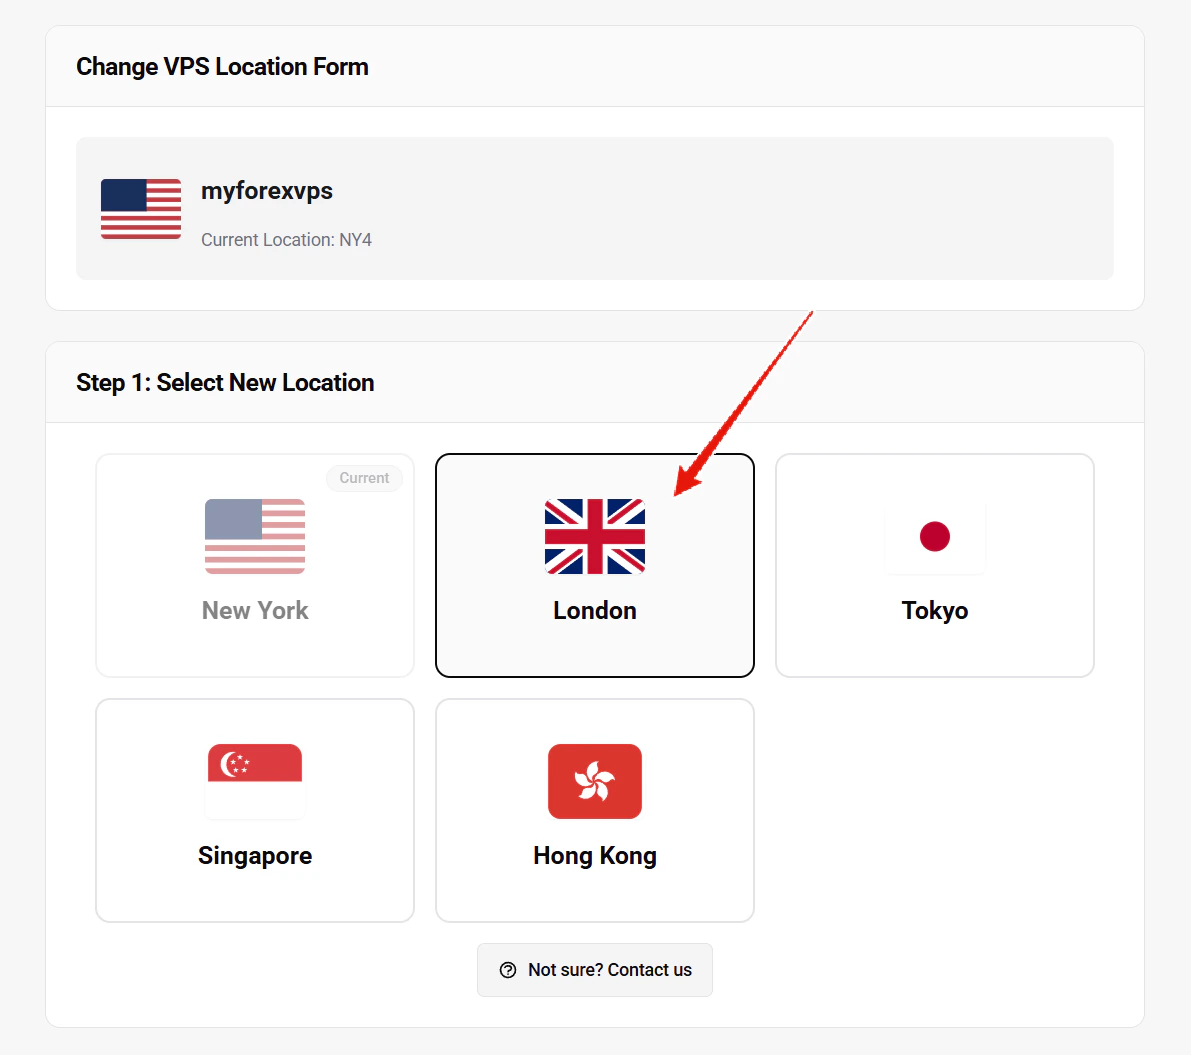
- New York
- London
- Dublin
- Tokyo
- Singapore
- Hong Kong
Select Reason for Migration
In Step 2, select the reason for your migration request. This helps our team process your request.
Choose Migration Timing
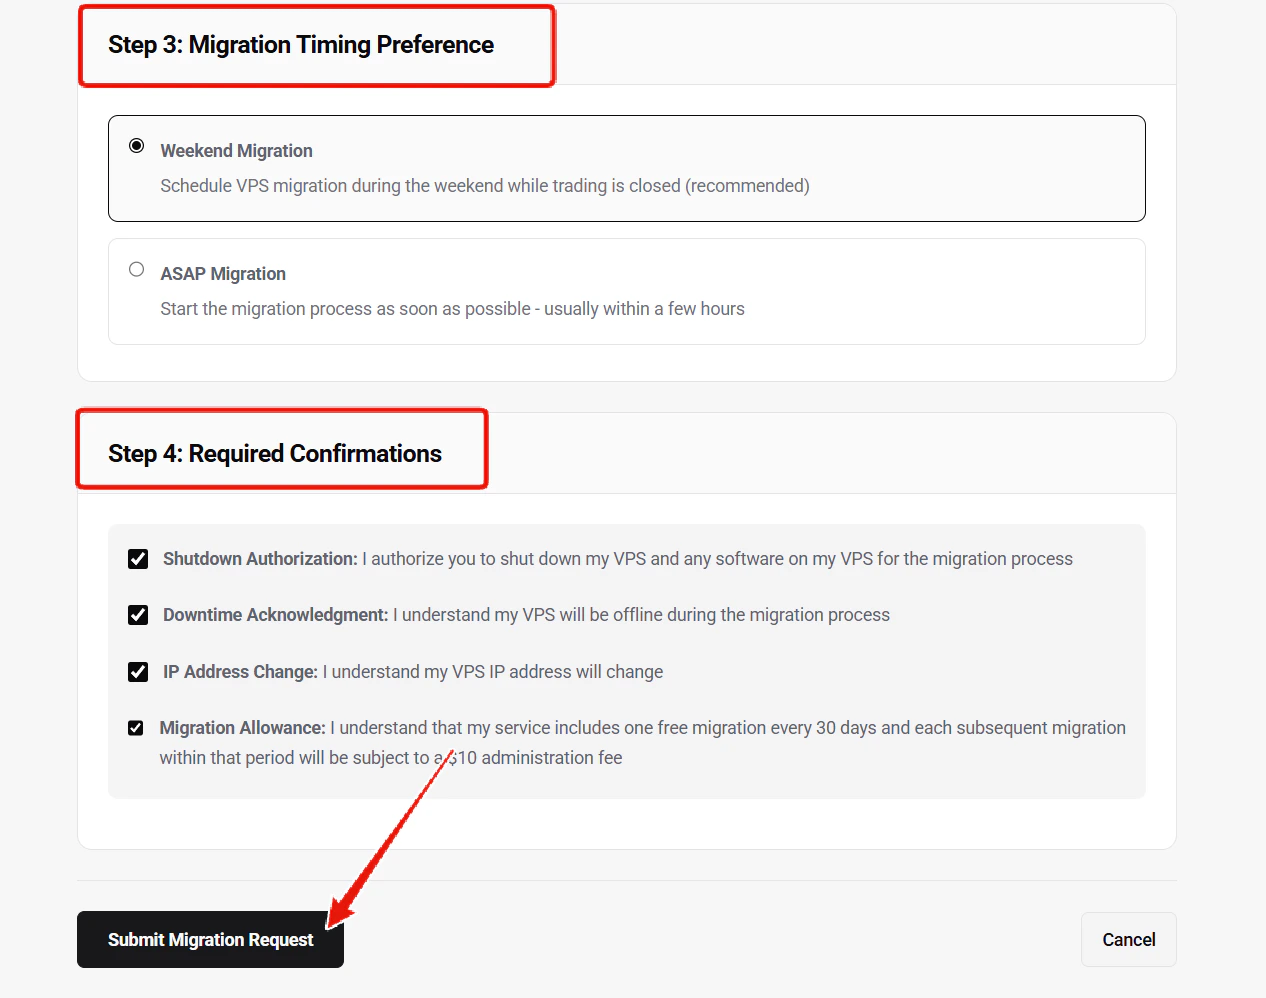
- Weekend Migration (recommended) — your VPS will be migrated during the weekend while trading markets are closed
- ASAP Migration — the migration process will start as soon as possible, usually within a few hours
Review Required Confirmations
In Step 4, review and check all required confirmations before submitting:
- Shutdown Authorization — your VPS and any running software will be shut down during the migration
- Downtime Acknowledgment — your VPS will be offline during the migration process
- IP Address Change — your VPS IP address will change after the migration
- Migration Allowance — one free migration is included every 30 days; additional migrations are subject to a $10 fee
Submit Migration Request
Click Submit Migration Request to confirm. You will see a confirmation page showing the status of your migration.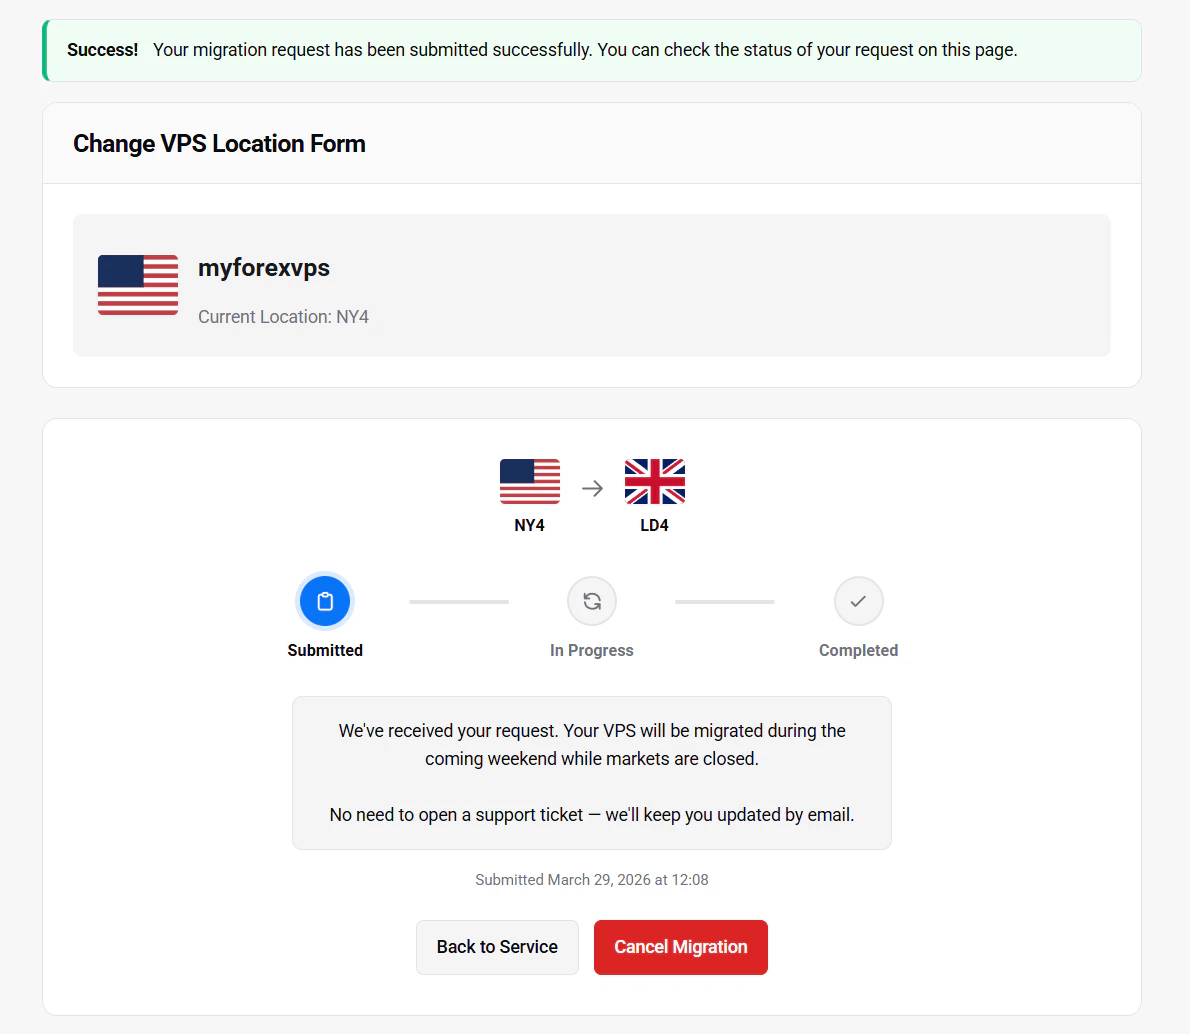
After Migration
- You will receive an email notification when the migration starts and another when it is completed
- Your VPS username and password will not change — only the IP address will be different
- Update your remote desktop connection with the new IP address provided in the completion email